Midjourney is the most renowned AI for generating images from prompts.
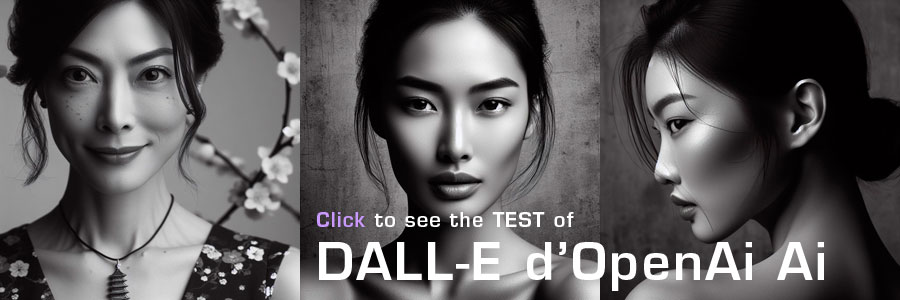
This fourth instalment of our text-to-image AI tests compares Midjourney 5.2 with Adobe’s Firefly beta, OpenAi’s DALL-E 3 and Stable Diffusion 1.5 under the same conditions.
Midjourney, the eye-popping AI
Our virtual session always begins with the same prompt:
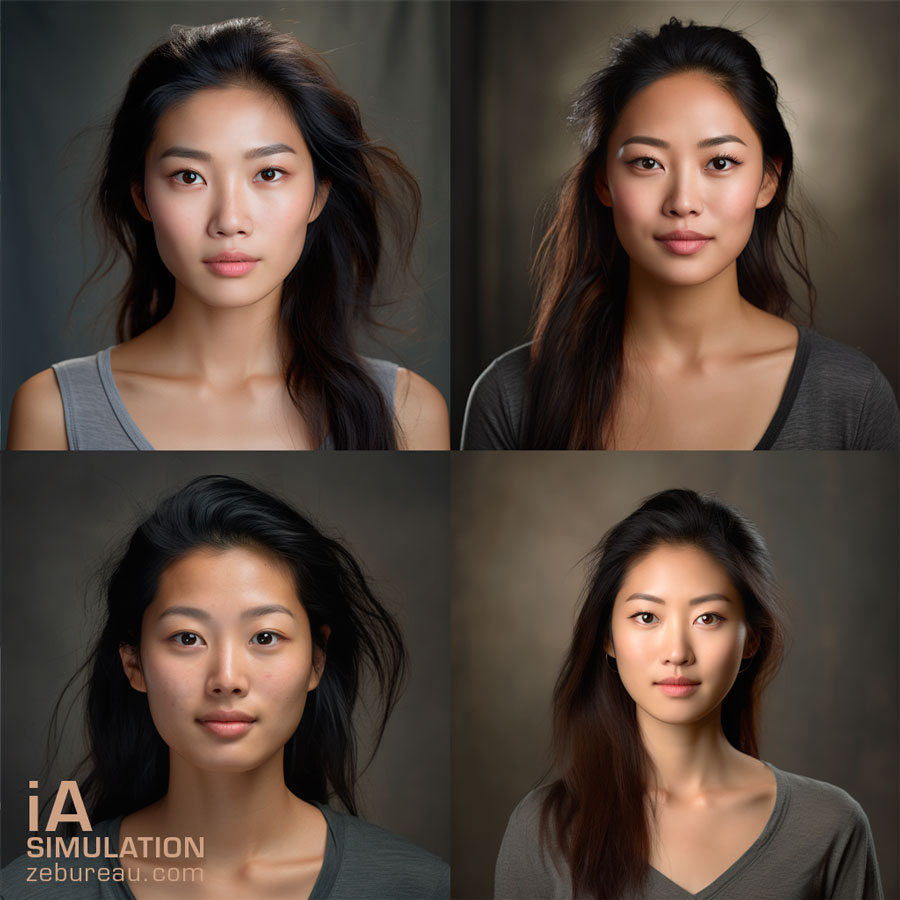
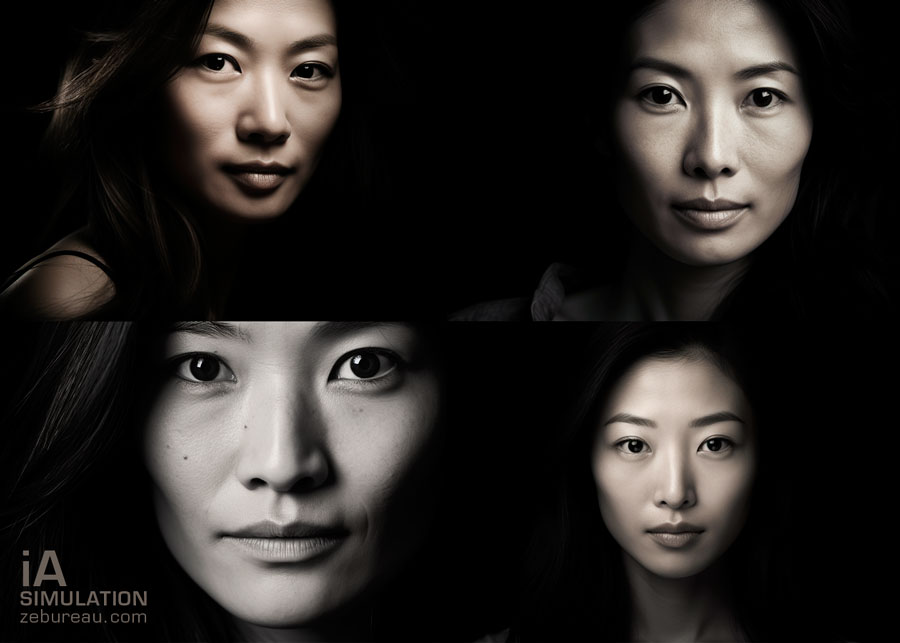
“Photo shoot in a small photo studio with two lightboxes. The model is a Eurasian woman. The back of the studio is made of rough concrete.”
As the term Eurasian is not included (as in all the AIs tested so far) in the first 4 images, we immediately replace it with Asian for the next 4 images (right).
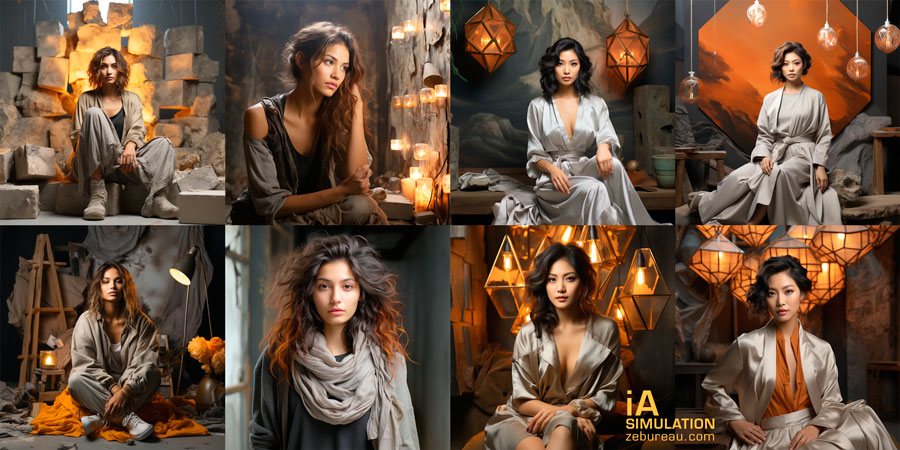
With the default settings, Midjourney immediately sets out to impress, creating rich, creative backgrounds!
If you don’t really have any ideas, this AI will always have something for you!
The renderings are of good quality and very photorealistic. This was true throughout our virtual shoot with Midjourney, a reference in the field.
But with these first two series of images, we immediately understand the mistake made in leaving the “very high stylization” setting on, which leads Midjourney to overdo it and stray too far from the prompt.
By opting for reduced stylization and switching to RAW mode, which more faithfully respects the prompt, we’ll be able to continue our studio portrait session in a simpler, more contained setting.
French touch
Midjourney was originally designed to work in English, but the AI now also understands French quite well.
We take this opportunity to make a comparative test in both languages, based on the following prompt:
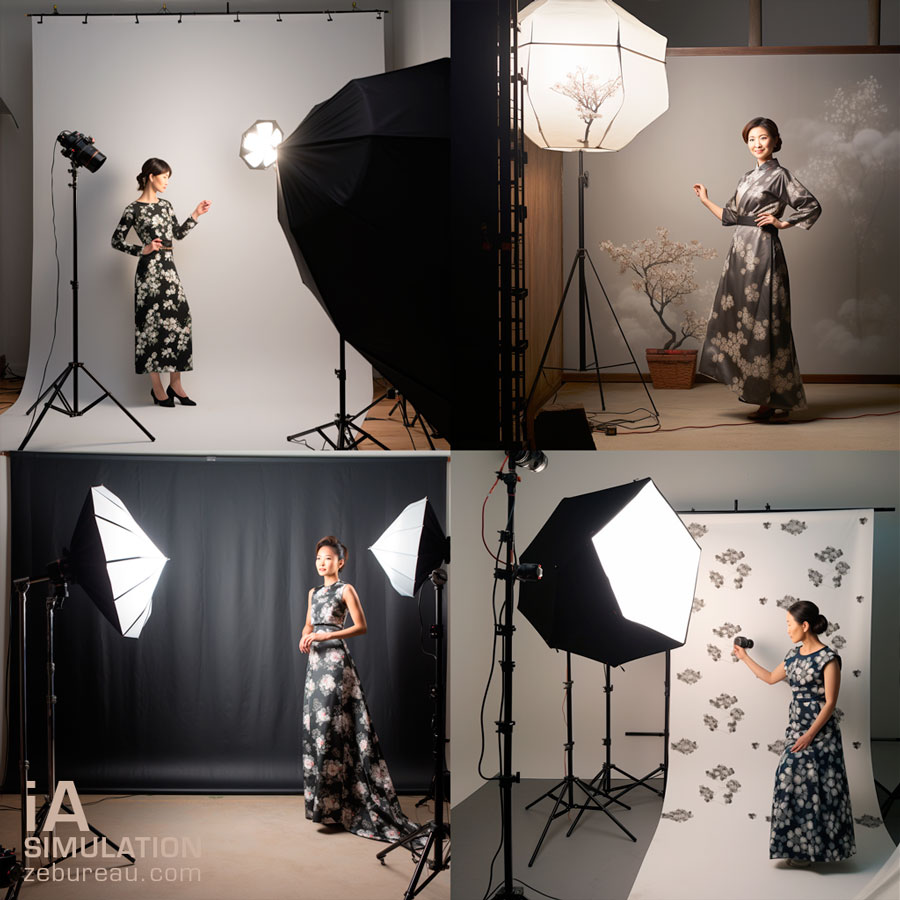
“Photorealistic shoot in a professional photo studio with two octagonal lightboxes. The model is an Asian woman. The studio backdrop is a rough concrete wall. There are no props in the image”.
Surprisingly, Midjourney was more faithful to the French prompt than the English one!
We may have incorrectly used the term “lightbox” instead of “softbox”, but it’s amusing to note that in French, the AI placed more lighting and studio backgrounds (the 4 images on the left), whereas in English it created a very different, more sophisticated atmosphere with decorative lighting.
The AI’s learning process seems to have stopped at the hexagonal shape, as none of the lights will have eight sides in all our subsequent attempts!
Including in our tests in advanced mode, using images as examples.
For the rest of the test, we’ll be formulating all prompts in English, taking advantage of the opportunity to use the more appropriate term “softbox”.
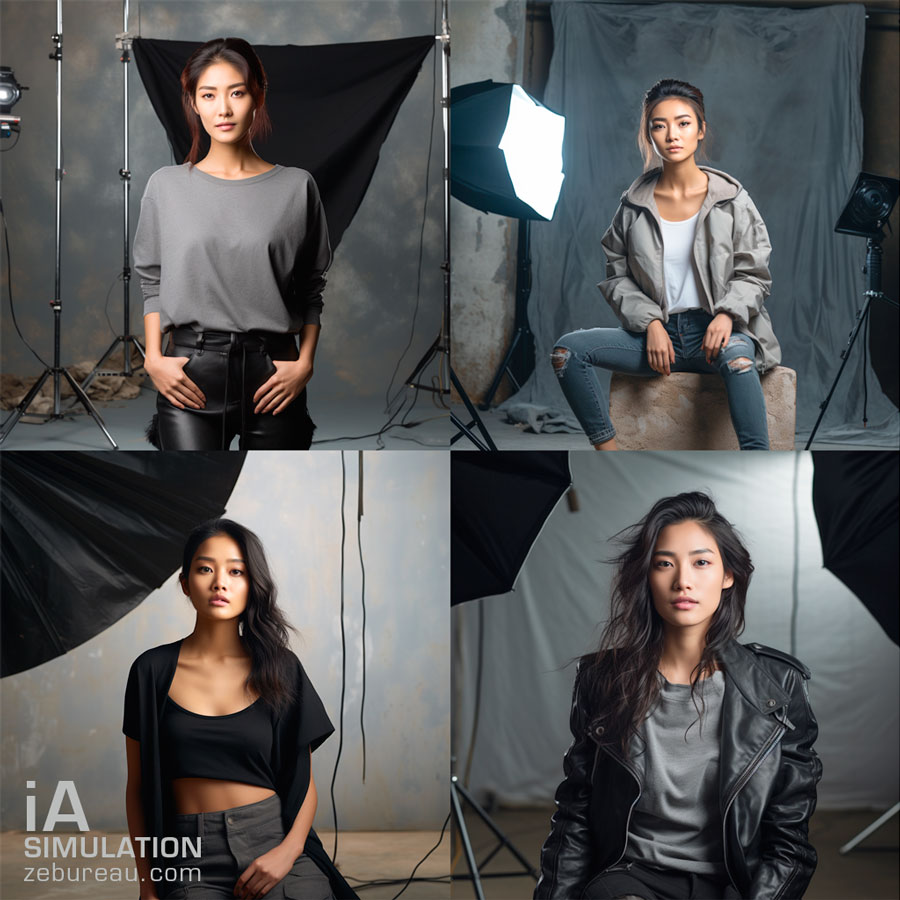
The simple use of the term Softbox to put Midjourney back into our photo studio context!
It’s a lesson to keep in mind: a single word misused (or misunderstood) by the AI can completely change the images produced.
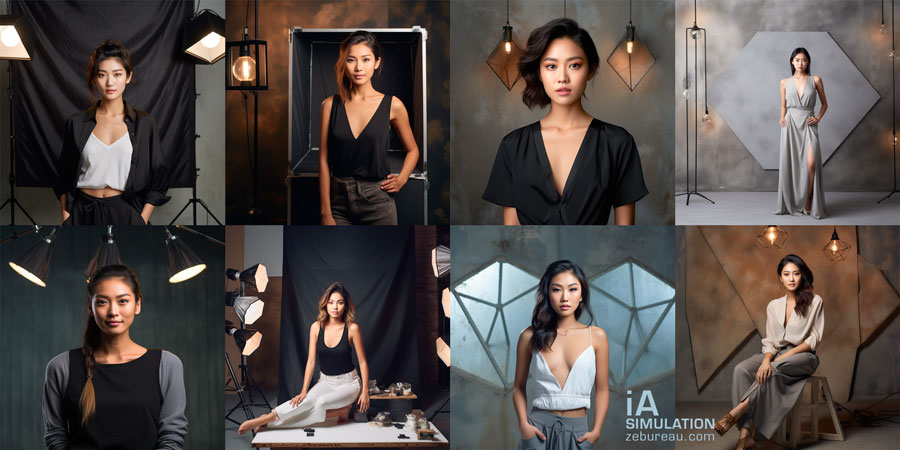
The first proposals are varied: different outfits, positions and backgrounds.
The visuals are more or less what you’d expect, even if there are a few quirks with the forearms and a very distorted softbox.
Midjourney allows you to correct parts of a selected image, so it would of course be possible to rework one of these images to improve it in just a few extra steps.
Midjourney studio portraits
As with the other AIs tested in this blog, we remove the lights from the scene and tighten up our portrait a little more.
Midjourney lets you specify a lens focal length in the prompt, so we took the opportunity to switch our virtual shoot to 85 mm:
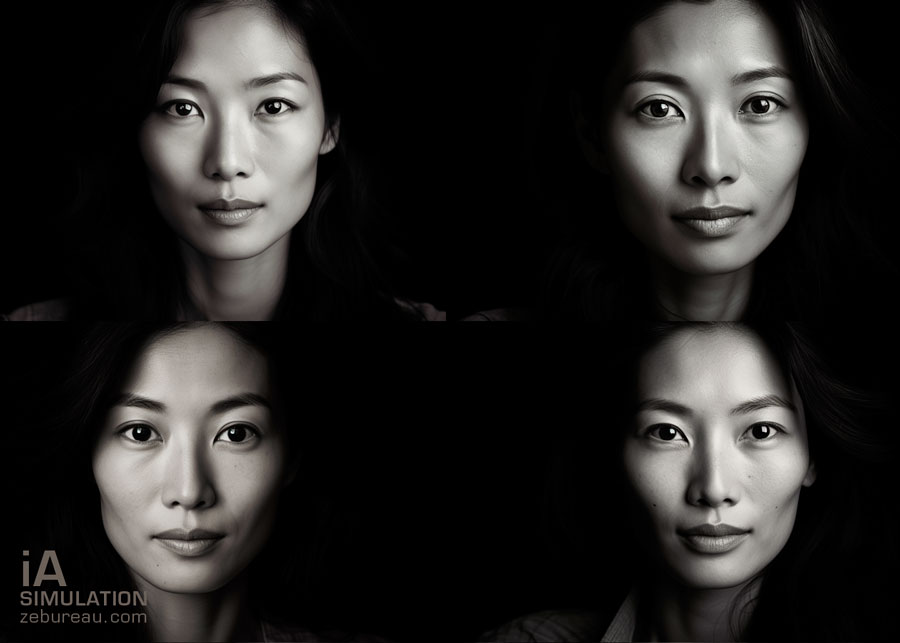
“Professional studio photo shoot with 2 light sources and photo-realistic rendering. Close-up portrait, 85 mm, of an Asian woman. The background is a rough concrete wall.”
As with other AIs, with the exception of DALL-E 3, which performs very well on this point, Midjourney won’t be able to put a real concrete background in our studio (although the AI knows how to do it in interior architectural views).
We create “subtle” variations from the first face in the previous image.
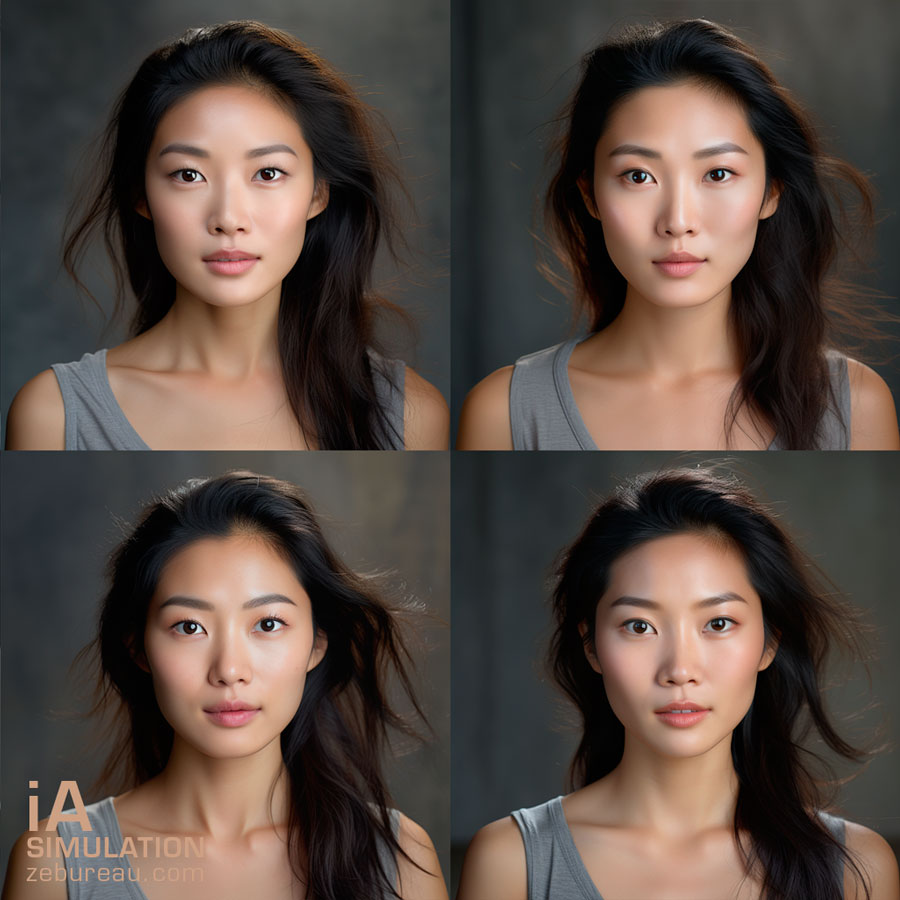
The 4 proposals, which vary only in small details, are all interesting, and there’s no need to go on making other variations ad infinitum.
As with a real portrait shoot (Article coming soon), you have to stop and make a choice.
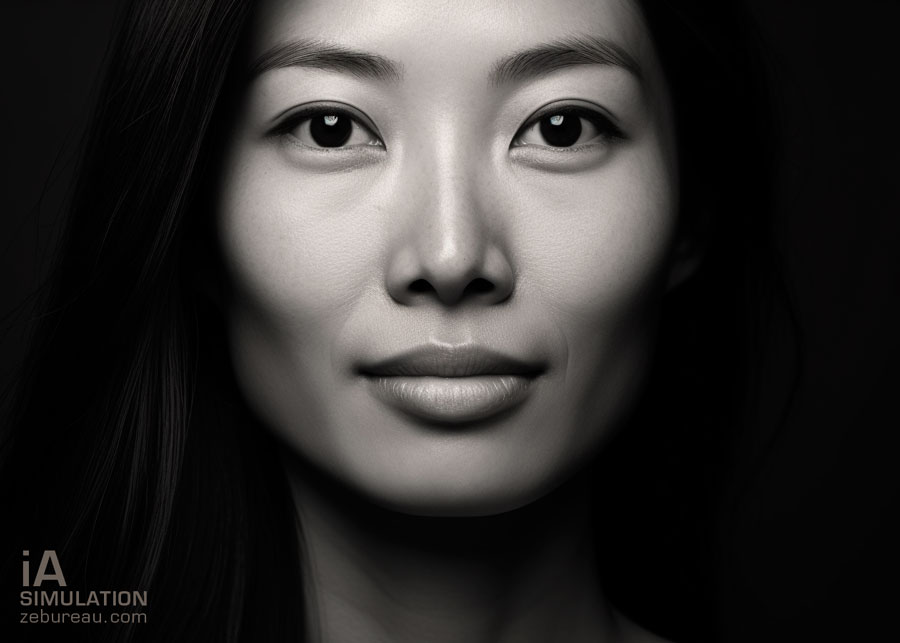
The Midjourney color portrait
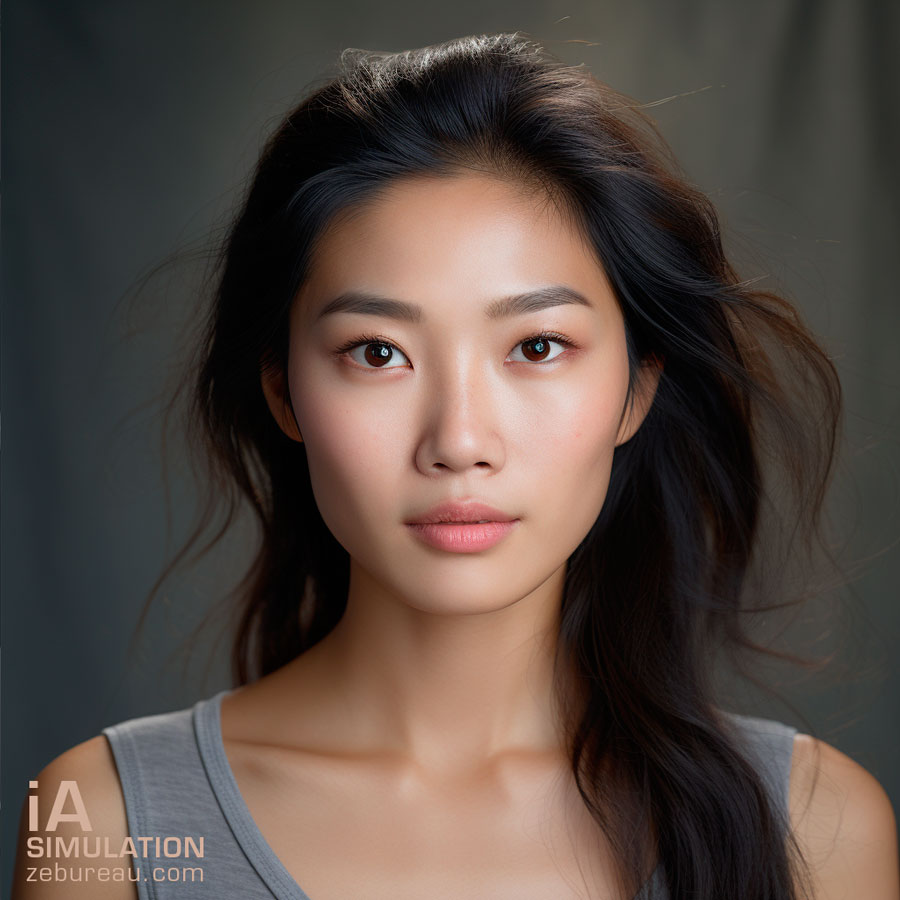
This quality portrait, shot by Midjourney in just a few tries, features an interesting skin texture, a slight blurring of the shoulders, and a very fine rendering of the hair.
Midjourney, the black and white that makes you see all the colors
We’re back at it again with our updated black and white portrait prompt.
We take the opportunity to choose a 135 mm focal length and a single light source:
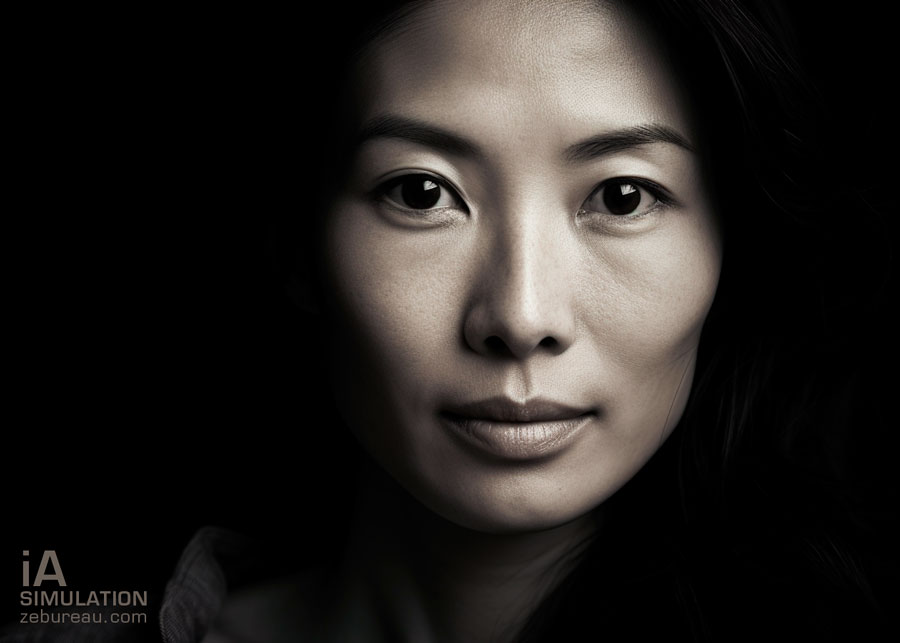
“Professional studio photo shoot. Realistic photo rendering. Extreme close-up portrait of an Asian woman, 135 mm. One light source. High-contrast black and white.
As with all other AIs, we quickly abandoned the “Studio Harcourt style”, which produced nothing.
We can also tell you right away that we’re going to run into the same problem as with Stable diffusion 1.5: Midjourney 5.2 can’t produce all black and white images.
The AI respects the single light source requested: the reflection of a softbox in the eyes corresponds to the angle of the light on the face.
We decided to age the young models proposed by default by specifying an age of 35 in the prompt.
We also decide to change the width-height ratio of the generated image. To do this, we need to use a special command in the prompt.
By default, Midjourney automatically inserts a code for the square format equivalent to “–ar1:1“.
We choose the “–ar7:5” format (you’ll need to learn how to use Midjourney’s Discord interface, which isn’t exactly a model of user-friendliness – see the Discord interface tutorial for Midjourney at the end of this article).
For all the renderings in this test (with the exception of the final stages of portrait refinement), we selected the “high variation” mode, which gives us 4 very different proposals each time.
The choice of a single light and the indication of “contrasting black and white” resulted in an interesting skin texture.
We’ve selected our favorite image, #2, to use on the front page of this article.
Midjourney in remix mode
As we’ve already used for color portraiture, MidJourney “remix” mode is an advanced mode that allows you to start from a selected image and modify its prompt to generate more precise variants.
By default, when remix mode is deactivated, the variation buttons generate images without any possible control.
We’ve kept our template to generate these very satisfying proposals. All that remains is to select one of the portraits to generate a final variant in “remix” mode, adding a half-smile.
The Midjourney black and white studio portrait
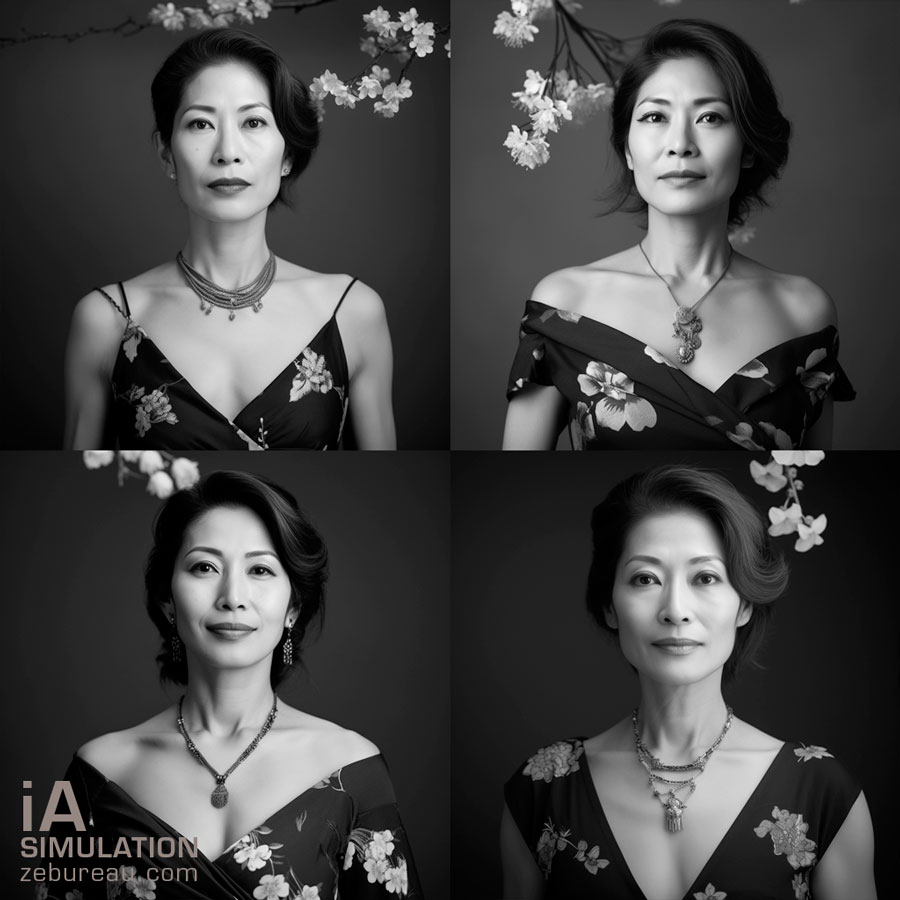
Japanese portraiture
We end this virtual photo session with: “A portrait of a 40-year-old Japanese woman with a half-smile. She’s wearing a cherry blossom dress. The background is composed of cherry blossom branches. 135 mm lens. Black and white contrast. –ar 1:1 “
The yellowing AI bias: from that moment on, Midjourney began to “yellow” (as if they were old photos) the majority of the following portraits, which we all switched back to black and white.
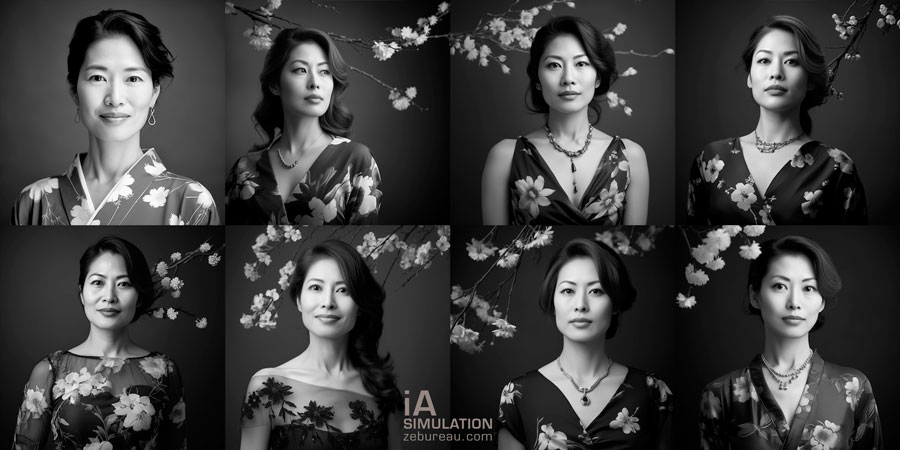
Midjourney in “Var (strong)” mode produces very diverse and successful proposals, in terms of composition, hairstyles and dresses. We decided to take a final leap back in time by aging one of the models to “50”.
Pagoda, pagoda!
Adding to the prompt our “pagoda pendant” which has trapped the other AIs tested in this blog, with the exception of DALL-E 3, how will Midjourney fare?
The AI does create necklaces, but none with a pagoda motif!
We took advantage of the advanced mode and tried several times to modify only the pendant in localized mode (including using a pagoda image as an example), but to no avail.
The only positive point is that MidJourney doesn’t systematically impose additional earrings, as Adobe Firefly did.
The 50-year-old models generated by Midjourney have virtually no wrinkles, but have the skin texture we might have preferred to see on slightly younger models.
We do our final Japanese rendering starting from model #4, and asking for a few more wrinkles in the prompt:
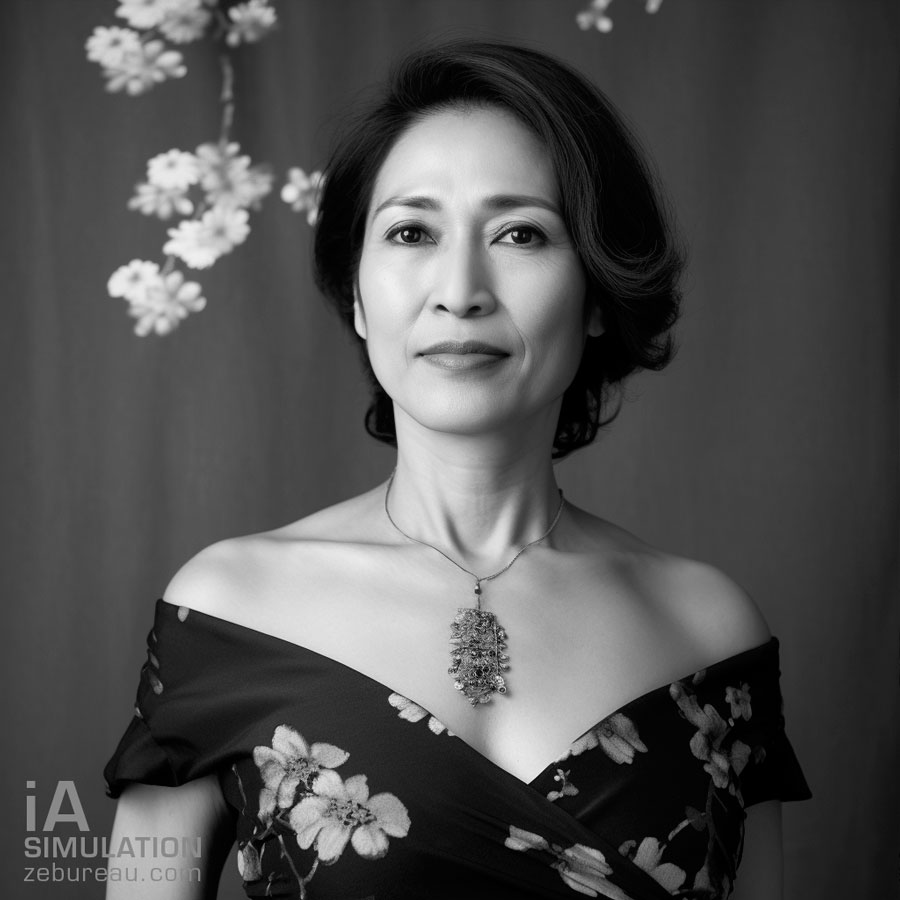
Midjourney added very subtle wrinkles around the eyes and mouth of this beautiful 50-year-old Japanese woman, bringing this virtual portrait session to a brilliant close.
How to use the Midjourney interface
The price of success, MidJourney has been a paying service since 2023, with several offers starting from $10/month.
To use Midjourney, you need to use the Discord application.
We’re not going to go into detail about all the features of AI, as there are many, but we’ll give you the main basics on how to use it.
Midjourney’s command language
Discord is basically a chat application, not really suited to hosting applications. As a result, Midjourney’s interface in this software is impractical and a little outdated, not to mention that it seems to come from the prehistory of computing.
4 essential commands for using Midjourney in Discord.
- The “/settings” command displays the settings panel and allows you to set your image rendering preferences.
- The “/imagine” command enables you to activate the prompt input field before launching a rendering.
- The “/describe” command brings up an “IMAGE” button that lets you upload a personal image for reference before generating a rendering.
- The “/info” command displays the status of your current Midjourney credit consumption and available CPU time.
Midjourney rendering settings
The “/settings” command brings up the settings panel:
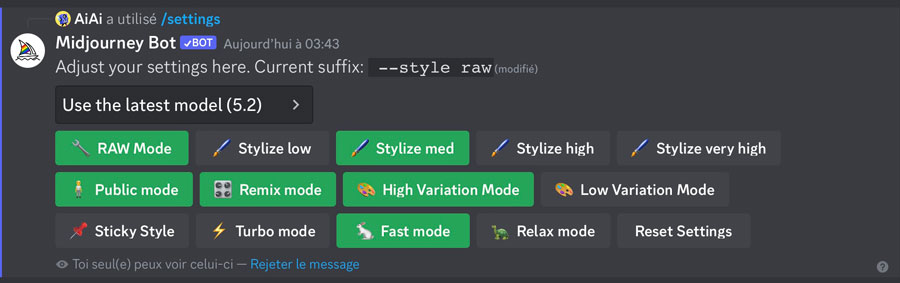
- RAW” mode is the rendering mode that allows you to produce better photorealistic renderings and gives you more control over the results by more precisely respecting the content of your prompt.
- There are 4 levels of stylization: “low” mode is the closest to the prompt, while “high” mode gives the AI the most freedom to add its “artistic” ideas.
- Public mode means that all your images are public (you need a pro subscription to keep your images private).
- Activating “Remix mode” lets you start from previous images by modifying the prompt.
- The “High” and “Low” variation modes let you choose the level of difference between the 4 images generated.
- “Sticky style” locks your favorite image style: this is an advanced feature that lets you create several image styles using the /tune command, for which you can enter a unique code in your prompts.
- The 3 buttons, Turbo, Fast and Relax, let you choose the speed of image generation.
Creating images from a Midjourney prompt

Enter /imagine in the text field, then click on “prompt” to display the prompt, then enter your full prompt.
Click on the blue button to launch the 4 renderings.
By default, MidJourney generates four images.
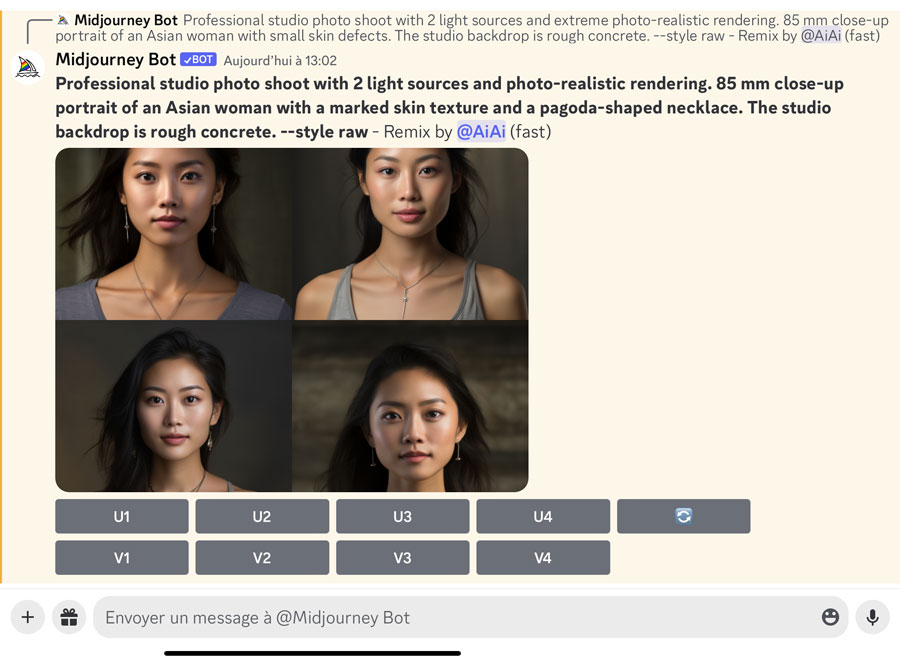
- The “U” buttons are used to generate the corresponding image in 1024 x 1024 px format.
- The “V” buttons either automatically generate variants of the portrait, or, if you’re in “Remix” mode, give you the option of modifying the prompt before generating variants of the corresponding image.
- The “double arrow” button relaunches 4 new renderings.
Once an image has been generated in isolation, new options appear.
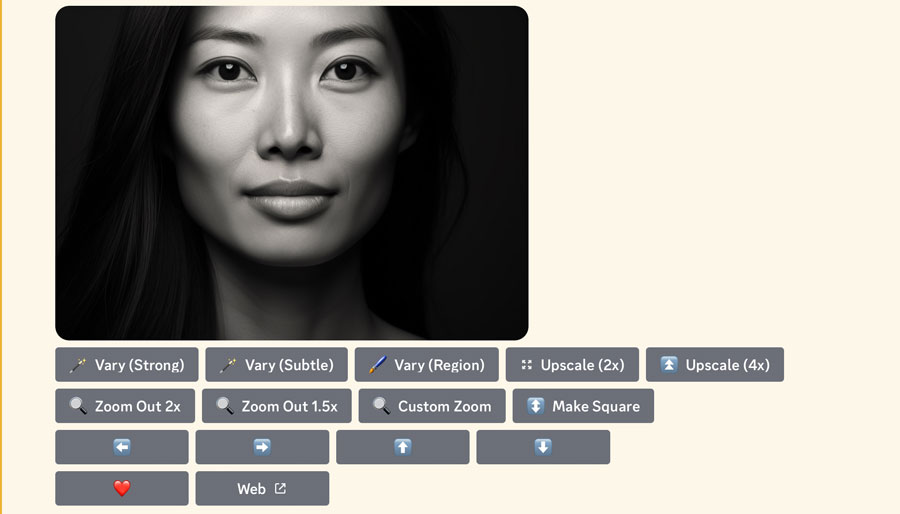
- The “Vary” buttons can be used to create new variations, strong or subtle, of the image.
- The “Upscale” x2 or x4 buttons create enlarged versions (resampling).
- Zoom” buttons enlarge the rendering area around the image already created.
- Arrow buttons enlarge an area on one side of the central image.
- The “Heart” button.
- The “share” button to create a link to the image.
Import one of your images into Discord

Clicking on the + (to the left of the input field), allows you to import an image from your photo library into Discord, to be used as a starting point for new images.
Once your image has been imported in this way, you’ll need to copy its URL so you can paste it at the start of a prompt.
Generate prompts from an imported image or external link
To use an image external to Midjourney as a reference, you need to insert its URL at the start of a prompt.
You can use any existing image as the basis for your Midjourney creation in three different ways:
- By using Midjourney’s own “/describe” command, which creates an IMAGE button above the input field: by clicking on this button, you can directly select an image from your photo library, which Midjourney automatically inserts at the start of the prompt.
- By copying an image URL directly from a website.
- By importing it directly into Discord using the method described in the previous point, then copying its URL into Discord.
Other useful tips about Midjourney
- There is no real history, and after hundreds of images have been generated, it can be complicated to find unsaved images:
- To keep better track of your productions, we advise you not to use the various threads offered, and to create your renderings only in the “Midjourney Bot” thread. You can also “Pin” your best renderings as you go along, to make it easier to find them later.
- MidJourney creates square images by default: to choose a custom image format, change the basic value “–ar 1:1” in the prompt with other numbers, for example –ar 3:2 for a standard landscape format or –ar 16:9 for a cinema format.
- To remove an unwanted element from an image (the equivalent of Stable Diffusion’s negative prompt), add the command :
–no
followed by the element to be removed, for example –no tree - Multiple prompts can avoid misinterpretation of MidJourney:
rather than separating words with commas, it’s possible to add :: after each word so that they are properly considered separately.
For example, “studio:: photo::” is interpreted differently by Midjourney than “studio photo”. - To adjust the importance given to certain words over others, simply add a number after ::
followed by a number between 1 and 100, e.g. tree:: 100 mountain::10
MidJourney, the benchmark in text-to-image AI
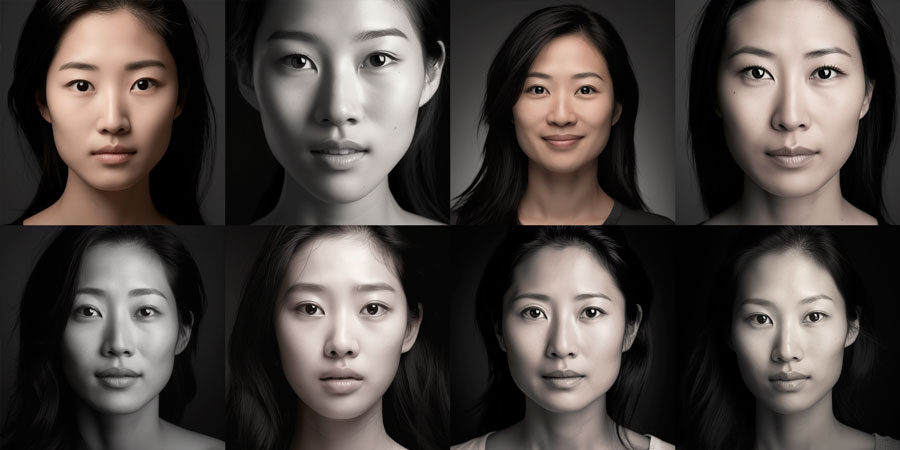
Faces and bodies
MidJourney masters the rendering of faces and bodies, producing images with no apparent flaws.
Without any particular indications, the AI proposed a variety of “normal” faces, as did Adobe’s Firefly beta, while DALL-E 3 or Stable diffusion 1.5 more systematically proposed young beauty models.
MidJourney seems to be a bit limited (no pun intended), since it immediately blocked us when we tried to use the innocuous term “sexy”, whereas Stable Diffusion 1.5 undressed our model without hesitation (this seems to have been corrected with version 2).
Prompt interpretation
Given enough freedom, MidJourney’s AI is capable of generating sophisticated, high-impact images: it has a know-how and a creative base above all others.
But after the “wow” effect of MidJourney 5.2’s renderings, we realize that this AI is less adept at understanding and fulfilling our requests than DALL-E 3, which takes advantage of ChatGPT. MidJourney quickly gets tangled up if formulations are not simple enough, and as soon as prompts exceed fifteen words. In this respect, it has some of the same limitations as Stable diffusion 1.5.
In our studio scene simulation, MidJourney didn’t quite manage to create a photo studio interior with realistic studio lighting (see last test at the end of this article), unlike DALL-E 3, which was able to recreate studio scenes with very few faults.
In this respect, MidJourney is tied for second place with Stable diffusion 1.5, followed by Adobe’s Firefly beta.
Photorealism
In terms of photorealistic rendering, MidJourney 5.2 has little to prove, and is probably the best. The gap between MidJourney and its rivals has narrowed.
MidJourney is the only AI we’ve tested in pro mode, as it is no longer offered free of charge as of this year.
That’s why we didn’t push it too hard, so as to be able to compare it more fairly with the free versions of the 3 other AIs we tested previously.
COLOR PORTRAITS – BLACK & WHITE PORTRAITS – MIDJOURNEY INTERFACE
Midjourney 5.2 interpretation capabilities versus DALL-E 3
Throughout this test, we battled with the Midjourney AI to keep to the prompts (we’ve spared you the misfires).
Finally, we subjected it to the same detailed prompt that only DALL-E 3 was able to represent directly without errors or omissions:
“Shooting in a photo studio. A photographer takes a black-and-white photo of a half-smiling 35-year-old Japanese woman wearing a cherry-tree patterned dress. Two octagonal light boxes, one large and one small, illuminate the scene from either side. The back of the studio is made of rough concrete.”
The results are far from bad, but there’s a major oversight, for example, in the absence of the photographer requested.
What’s more, the integration of the cherry tree motifs is sometimes done in the wrong way, the softboxes are each more misshapen than the last and the studio background is never concrete.
That’s a lot of misinterpretation compared with DALL-E 3’s impressive respect for the prompt.
Of course, we’re well aware that the inside of a photo studio is a very difficult thing to recreate, but this allows us to compare the performance of the different language models, and gives DALL-E a clear advantage over all its competitors in this respect.
AIs are well trained on human representations, landscapes and many everyday objects. They still have some way to go before they can simulate the lighting equipment in our photo studios, as the 3D application set.a.light tested in this blog does so perfectly (Article coming soon).